Skip to content
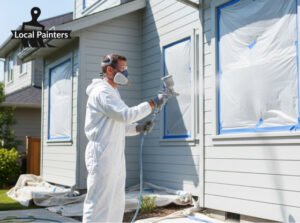
To effectively tape and cover windows before painting, start by thoroughly cleaning the window frame and glass to ensure the adhesive bonds correctly. Apply high-quality painter’s tape along the edge where the glass meets the sash, leaving the tape slightly loose in the corners before pressing it tight with a putty knife to create a seal. Once the perimeter is taped, attach pre-taped masking film or heavy plastic sheeting to the top edge of the window frame, unroll it to cover the glass, and secure it to the side and bottom tape borders.
This process, often called “masking off,” protects the glass from splatter and produces sharp, professional lines. Skipping this step or doing it poorly leads to hours of scraping dried paint off windows later. With the right materials and technique, masking a standard window takes about five to ten minutes. At Local Painters, experience shows that investing time in this preparation phase significantly speeds up the actual painting process and delivers a superior finish.
Essential Tools and Materials
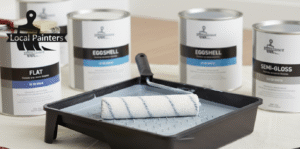
You cannot achieve a professional result with standard beige masking tape. It dries out, leaves sticky residue, and allows paint to bleed underneath. You need specific tools designed for painting.
Painter’s Tape: Use “edge-lock” technology tape. Green tape is generally best for preventing bleed on textured surfaces, while blue tape works well for glass and smooth vinyl.
Hand-Masker Dispenser: This tool applies tape and plastic film simultaneously. While professional painters use these daily, a simple roll of tape and a separate roll of plastic work fine for DIY projects.
Plastic Sheeting or Masking Film: Thin, static-cling plastic is ideal because it sticks to the glass on its own, holding itself in place while you tape the edges.
Putty Knife or 5-in-1 Tool: You need this to “burnish” or press the tape down firmly to prevent paint seepage.
Microfiber Cloth: For cleaning the surface before taping.
Preparing the Surface
Adhesion is the biggest challenge when taping windows. If the surface is dusty, chalky, or damp, the tape will peel off before you even pick up a brush.
Wipe down the window trim and the outer edge of the glass with a damp microfiber cloth. If you are painting the exterior and there is heavy oxidation or dirt, you may need a mild detergent. Let the surface dry completely. Tape applied to a damp surface will fail immediately. According to technical data from 3M, surface temperature also matters; applying tape when the surface is too hot (above 100°F) can cause the adhesive to turn gummy and stick permanently to the glass.
The Taping and Covering Process
Effective masking follows a logical order. You want to create a barrier that sheds water (or paint) naturally, similar to how shingles work on a roof.
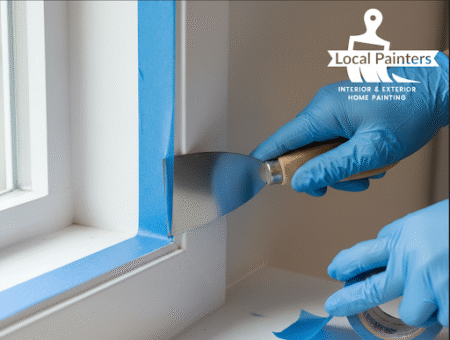
Establishing the Perimeter
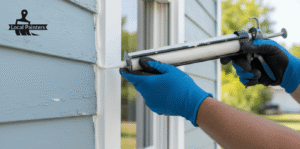
Run your tape along the edge of the glass where it meets the frame. Do not try to stretch the tape into the corners. Stretching causes the tape to pull back, effectively creating a gap where paint can enter. Instead, run the tape into the corner, cut it, and start a new strip for the next side.
Once the tape is applied, run a putty knife over the edge of the tape. This creates a tight seal. A report on adhesive performance by Pressure Sensitive Tape Council highlights that pressure-sensitive adhesives require firm application force to wet out the surface and create a true bond. Without this pressure, the tape sits on top of microscopic surface irregularities, allowing paint to bleed under.
Shielding the Glass
After the perimeter is secure, apply your plastic sheeting. Tape the top of the plastic to the top edge of your perimeter tape. Unroll the plastic down the window. Secure the sides and bottom of the plastic to the existing perimeter tape. This “tape-on-tape” method ensures that when you pull the plastic down later, you do not accidentally rip the tape off the glass.
Bonus Tip: The Razor Cut Method
If you have steady hands, you can overlap the tape onto the glass and painting surface slightly. After painting, but before the paint fully cures, run a sharp razor blade along the corner. This cuts the paint film and allows you to pull the tape without peeling the paint off the trim.
Comparison of Masking Materials
Choosing the right tape prevents damage to your windows. This breakdown shows which material suits specific window conditions.
Masking Materials Table
| Material | Best Application | UV Resistance | Removal Timeframe |
| Original Blue Tape | Glass, cured paint, vinyl | Medium (14 days) | Up to 14 days |
| Green FrogTape | Wood trim, textured surfaces | Medium (21 days) | Up to 21 days |
| Exterior Weather Tape | Exterior surfaces in direct sun | High (7 days) | Up to 7 days |
| Paper/Brown Masking | DO NOT USE on Windows | None | Less than 24 hours |
Things to Consider Before Starting
Before you buy supplies, look at your project scope. If you live in the Surprise, AZ area, we offer local painting services to help you get started: Painting in Surprise, AZ
Sun Exposure
If you are taping exterior windows in direct sunlight, standard blue tape might bake onto the glass in less than two days. Baked-on tape requires razor scraping and solvents to remove. If the project will take more than a weekend, buy UV-resistant tape specifically rated for exterior use.
Interior vs. Exterior
Interior masking is about precision and protecting against roller splatter. Exterior masking must withstand wind and heavier paint application. For exterior spraying, use heavier plastic (1 mil or thicker) to prevent the force of the sprayer from blowing the plastic inward and sticking it to the wet paint on the trim.
Frame Material
Vinyl windows are flexible. If you tape them too tightly and the temperature creates expansion, the tape might shift. Wood windows are more stable but often have rougher grain that requires green tape for a better seal.
Common Mistakes to Avoid
Even with good tools, simple errors can ruin the job.
Waiting too long to remove tape: If you let the paint dry completely, it forms a solid bridge between the tape and the wall. Pulling the tape will rip the new paint off. Remove tape when the paint is dry to the touch but not fully cured.
Using narrow tape: Using 3/4-inch tape saves money but leaves little room for error. Use 1.5-inch or 2-inch tape to give yourself a wider safety net for brush strokes.
Ignoring the “Release” side: Plastic sheeting often has a treated side that holds paint mist (preventing it from flaking off) and an untreated side. Check the package to ensure the treated side faces out.
Common Questions About Window Masking
How do I tape arched windows?
Do not try to bend one long piece of tape. Use several short pieces (2-3 inches long) to follow the curve, overlapping them slightly like scales.
Can I use newspaper instead of plastic?
Newspaper is not recommended. It is porous, meaning heavy paint can soak through onto the glass. Ink can also transfer to the frame if it gets wet.
What if paint gets on the glass anyway?
Let it dry completely. Do not wipe it while wet, as this smears it. Once dry, use a fresh razor blade held at a 45-degree angle to scrape it off cleanly.
Does the tape go on the glass or the frame?
If you are painting the window frame (sash), the tape goes on the glass. If you are painting the siding around the window, the tape goes on the outer edge of the window frame.
Additional Frequently Asked Questions
How long can I leave painter’s tape on the window?
You should check the manufacturer’s rating on the inside of the roll. Most standard blue tapes are safe for 14 days, while some exterior-specific tapes are only safe for 3 to 7 days in direct sunlight. Leaving it longer increases the risk of adhesive residue.
Should I remove the tape while the paint is wet or dry?
The ideal time is when the paint is tacky—dry to the touch but not hard. If you must wait until it is fully dry, score the edge with a razor blade before pulling to break the bond.
Do I really need to cover the whole window or just the edges?
You should cover the whole window. Paint rollers release a fine mist of micro-droplets that float in the air. Without full coverage, your glass will end up with a gritty texture that requires tedious cleaning.
Can I use duct tape for outdoor windows?
Never use duct tape on windows. The adhesive is aggressive and leaves a heavy, gummy residue that is extremely difficult to remove from glass or vinyl frames without harsh chemicals.
Final Advice
Proper masking is the difference between a clean, crisp look and a sloppy finish. While it might feel tedious to tape every inch of glass, the protection it offers allows you to paint faster and with more confidence. Take the time to clean the surface, choose the right tape for your specific environment, and press those edges down tight.
Expert Painting Services
Painting requires patience and precision, especially when it comes to preparation. If you prefer to skip the ladder work and taping, Local Painters AZ is ready to handle the project for you. We ensure every window is protected and every line is sharp.
Sources
- 3M – Technical specifications regarding adhesive performance and temperature constraints for painter’s tape.
- Pressure Sensitive Tape Council – Industry reports on adhesive bonding requirements and application pressure.
- Family Handyman – Practical guides and survey data regarding painting preparation labor and techniques.