Skip to content

Summarize with
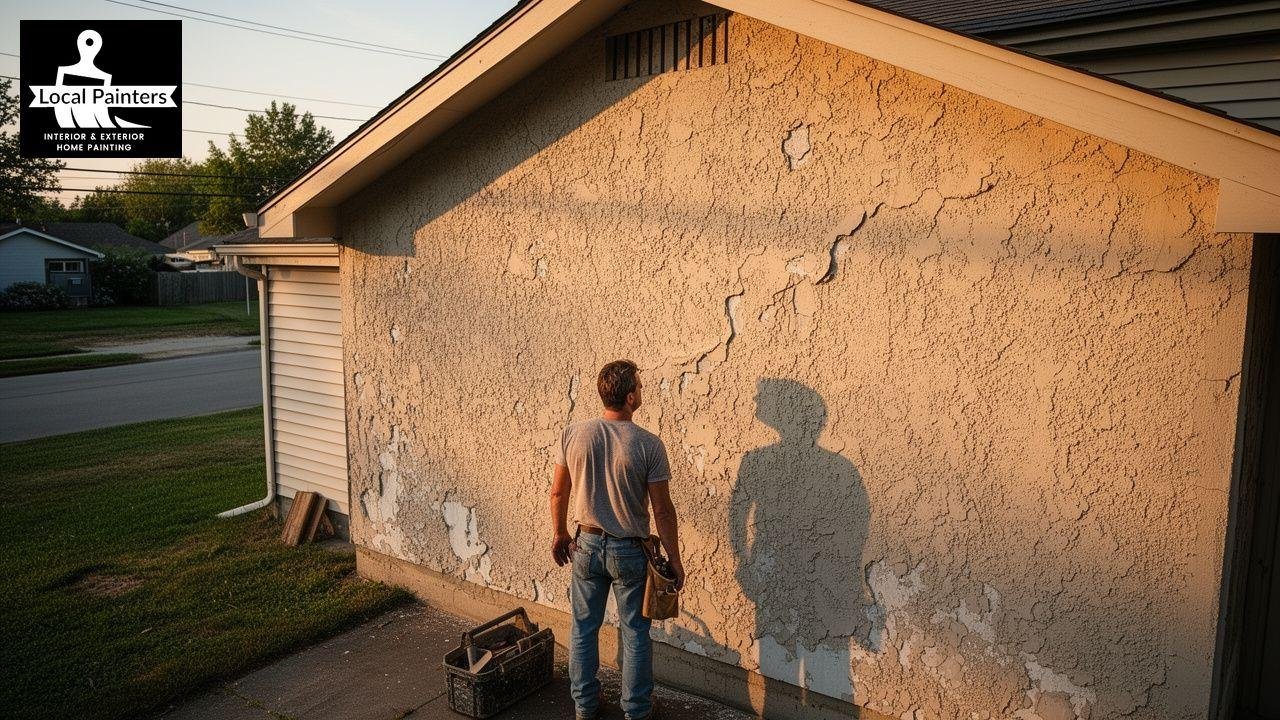
You look at your stucco and cringe the paint’s peeling. Colors fade in weird patches. You know it needs work, but it feels overwhelming. Where do you even start? Slapping paint over bad prep is basically throwing money away, which is the biggest mistake in Exterior House Painting.
According to the EPA guidance on exterior coatings, proper surface preparation and primer application reduce paint failure by up to 30%. That’s not overkill. That’s science showing why professionals do what they do with every exterior painting project.
We have equipment designed for the job. We buy materials at contractor prices, which is why professional exterior home painting often costs less per year than DIY mistakes.
Step 1: Begin With Stucco Surface Preparation
Stucco Surface Preparation starts with you actually looking at what you’ve got. Walk around your house and really examine the walls. Don’t just glance. Actually run your hands along the surface. Feel it.
When you touch the stucco, you’re feeling for problems. Does it feel solid? Or does it have soft spots? Hollow areas tell you the stucco is separating.
That’s delamination, and fixing it before painting separates amateurs from serious exterior painting projects. Tap your knuckles against different sections. Listen. Solid areas sound firm. Hollow areas sound dull and dead.
Look at where existing paint is peeling or bubbling. Those spots show you exactly where water is getting through. Paint peels when it is not bonded, and that usually means moisture.
Mark these mentally. You will focus on them later. This preliminary inspection takes thirty minutes but it is the foundation for everything.
Check for visible cracks. Big ones. Small ones. Hairline fractures. Get a flashlight and really look. Shadows help you see cracks that sunlight hides. Dark streaks on shady walls? That’s mold taking advantage of moisture.
Which is why understanding mildew prevention before Exterior House Painting matters significantly. Wipe it out now or it grows under your new paint. This stucco painting guide starts with understanding the true condition of your surface. That’s when proper planning actually begins.
Step 2: Complete the Initial Stucco Preparation
Stucco Preparation means clearing away everything that shouldn’t be near your wall. Walk the perimeter and look for bushes, vines, ivy, anything touching the stucco. These plants trap moisture. They cling to damp surfaces, and preparing your home for painting means removing these moisture traps entirely, which is essential to successful painting outcomes.
Look up at the roof. Trees hanging over gutters? Branches near the fascia? That debris falls into gutters and clogs them. Water backs up along the edge. It soaks into stucco at the top of the wall.
This is where water damage spreads down the entire surface, ruining any Exterior House Painting efforts you make. Cut it back. Takes an afternoon. Saves thousands later.
Now grab a pressure washer. Most people crank it too high and blast holes into stucco. Don’t. Use moderate pressure, around 1,500 to 2,000 PSI. This is cleaning, not demolition. Keep the nozzle at least a foot away. Use a wider spray pattern. Let water do the work. For a quality Exterior House Painting result, you need clean surfaces.
Step 3: Repair Cracks Before You Prepare Stucco for Painting
Preparing stucco for Painting requires fixing every crack you see because water is your enemy. Every crack is an invitation for water to get behind stucco. That’s why treating these properly before beginning Exterior House Painting separates professionals from weekend warriors. Cracks expand over time too. Today’s hairline becomes tomorrow’s problem. Fix them now.
Examine cracks under bright light. Are edges crumbling or solid? Crumbling edges mean the crack is active and growing. Use a painter’s tool or utility knife to widen small cracks slightly. Create a V-shaped groove that caulk can fill properly. Remove loose material. Blow it out with compressed air. This foundation work is critical to preventing future Exterior House Painting failures.
For hairline cracks, use paintable caulk specifically made for stucco. Don’t use regular silicone. It doesn’t bond well. Squeeze caulk smoothly into the crack. Wet your finger and run it along to smooth it. Make it level with the surrounding surface. Let it cure completely. Sand it smooth.
Larger cracks need more aggressive treatment. Apply stucco repair compound in layers if deep. Each layer dries before the next. Some contractors use fiberglass mesh tape for really wide cracks. It reinforces the repair and prevents reopening, which directly impacts the durability of your Exterior House Painting. Once dry, sand it smooth. This foundation holds everything.
Step 4: Focus on Cleaning Stucco Before Painting
Cleaning Stucco Before Painting means removing every speck of dust you’ve created during repair work. Let the wall dry completely.
Dust settles on fresh caulk and patching compound, creating a barrier that prevents proper paint adhesion when you begin Exterior House Painting. Your paint won’t stick if dust is in the way.
Use a dry brush or soft broom. Start at the top. Work downward. Brush firmly but gently. You’re not damaging stucco. Just getting dust off. Pay special attention to repair areas. Dust loves settling on fresh caulk. Rub these sections with a clean, dry cloth if needed. Get it spotless, which ensures your Exterior House Painting paint adheres perfectly.
Do a final visual walkthrough in different lighting. Morning light reveals things afternoon light hides. Look for remaining dust or questionable spots. Run your hand along the wall again.
If dust comes off on your hand, keep cleaning. This step feels tedious, but professionals spend real time here. It’s boring but non-negotiable for quality Exterior House Painting.
According to the National Association of Home Builders standards, professionally applied exterior paint with proper prep work maintains color and adhesion for 10 to 15 years in most climates.
DIY attempts typically get 5 to 7 years when done really well, which is why hiring professionals for your exterior Residence painting makes long-term financial sense. Your house is your biggest investment. Protecting it with professional work just makes sense.
Step 5: Apply Primer by Priming Stucco for Paint
Priming Stucco for Paint is where people get confused thinking primer is optional. It’s absolutely not. Stucco is incredibly porous, and skipping primer during exterior painting prep guarantees failure. The stucco sucks binder right out of the paint. Paint never cures properly. It ends up chalky.
Choose a primer specifically designed for stucco. Not generic primer. Not deck primer. Stucco primer. These are formulated to seal porous surfaces while letting walls breathe, which is essential knowledge for successful house painting projects. Acrylic latex primers work great. They’re easy to clean up, dry fast, and work with acrylic latex paint.
Apply primer in thin coats. Thick primer doesn’t help. It creates runs and takes forever to dry, which is why professionals know that the best exterior painting results come from multiple thin applications.
Use a 3/4-inch nap roller for flat areas. Use a brush for trim and edges. Keep your roller wet. Overlap by about six inches. Maintain a wet edge to prevent lap marks.
Let primer dry completely per the can’s instructions, usually 2 to 4 hours. After drying, check coverage. Any thin spots? Does stucco texture show through? You might need a second primer coat, especially in high-sun areas where heat affects how exterior house painting primer and paint cure properly. Two thin coats absolutely beat one thick coat every time.
Step 6: Choose the Right Paint for the Stucco Surface
The paint you pick determines how long this entire job lasts, which is why making smart choices here impacts your entire exterior painting investment. Acrylic latex paint is the go-to for stucco. It’s durable, breathable, and cleans easier than oil-based stuff. Stucco moves with temperature changes.
Skip pure latex paint. It doesn’t have enough protection. Look for 100% acrylic latex or an acrylic latex blend. The acrylic component adds durability and flexibility that extends the life of your outer house painting.
This isn’t the place to buy discount paint. Cheap paint requires extra coats. You end up spending more buying two coats of bargain paint than one coat of quality paint, which is why professional exterior house painting uses better materials.
Think about finish. Matte looks beautiful but doesn’t clean well. Eggshell gives better cleanability. Satin provides better durability. Consider Arizona heat. You want paint with UV protection and heat reflection, which is why desert-specific Exterior House Painting paint formulations exist. Desert sun destroys paint fast. Get paint formulated for intense heat.
Test your color choice before committing. Paint a 2×2 foot section on an inconspicuous area. Live with it for several days in different light conditions.
Colors look completely different at different times, which is a lesson that prevents regret in exterior house painting color decisions. A test section reveals problems before you’re locked in.
Step 7: Complete the Stucco Painting Checklist
The stucco painting checklist keeps you from skipping steps when actually painting, and this is where all your prep work pays dividends in quality exterior house painting results. Apply paint in thin, even coats. Don’t try to cover everything in one pass. Two thin coats provide way better coverage and durability than one thick coat that sags.
Paint top to bottom, maintaining a wet edge. Work quickly to prevent lap marks. Watch for drips. Stucco texture sometimes hides them temporarily. Walk around after 15 minutes looking for problems.
Fix drips before they dry by spreading them with the roller, which is a pro tip for avoiding mistakes in external painting.
Let the first coat dry completely. Most paint needs 4 to 8 hours between coats. The second coat is where everything comes together, and this is the coat where quality exterior house painting really shows. The first coat sealed the stucco.
The second provides color and protection. Work carefully. Maintain a consistent wet edge. This is the coat people see and judge for your exterior house painting quality.
Schedule Professional Stucco Painting Service
The complete stucco painting guide sounds good on paper until you actually do it. Most people get halfway through and realize they’re in over their heads, which is when they wish they’d hired professionals who understand Exterior House Painting at the level required for lasting results.
We deal with exterior painting projects throughout Surprise. We don’t cut corners. We don’t rush prep work. We use quality paint. We show up on time and finish what we start. Your house will look like the best maintained property on the block.
Local Painters handles stucco painting the right way. We prep thoroughly. We use quality materials. We take pride in the work. Your home deserves professional attention. Contact us at 602-775-3019 or localpaintersaz@gmail.com to schedule your consultation.
Frequently Asked Questions
How often should I repaint stucco in Arizona?
Every 7 to 10 years in Arizona’s brutal sun. Homes facing west fade faster than east-facing ones. Quality paint and proper prep extend these intervals.
Can I paint over old stucco paint?
Sometimes. If existing paint is solid and adhered well, new paint bonds over it. If it’s peeling or chalky, scrape it off first. Don’t paint over failure.
What’s the best time to paint stucco in Surprise?
October through April. Temperatures stay moderate. Humidity levels allow paint to cure correctly. Summer heat causes weird curing.
Do I really need primer on stucco?
Always, unless repainting over intact existing finish. Stucco is too porous to paint without primer. Skip it and your paint fails within years.
How long does a complete stucco painting project take?
Prep takes 3 to 5 days depending on wall condition. Painting takes 2 to 3 days for a typical house. Total runs 1 to 2 weeks including drying between coats.
Is Surprise’s climate harder on paint than other Arizona cities?
Not particularly worse, but elevation and sun exposure matter. Surprise gets intense direct sun. West-facing walls get hammered. These affect paint selection but not the fundamental process.
Can dust storms damage fresh paint?
Haboobs kick up dust after monsoons, but they don’t typically damage cured paint. Fresh paint might get dust on it. Light cleaning fixes it.
What should I do if paint cracks after painting?
Address new cracks during the next refresh cycle. Cracks repaired during prep don’t typically reopen. If new cracks develop, the house might be settling.