Skip to content

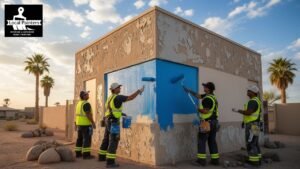
Professional exterior painting involves a systematic sequence of surface preparation, protection, and application. The process begins with a deep cleaning of the siding, followed by scraping away loose material, repairing damaged surfaces, and applying high-quality primers. Skilled crews then apply two coats of premium paint using specialized equipment to ensure a uniform finish that survives harsh environmental conditions.
This guide provides the specific house painting preparation steps and application methods used by residential painting contractors to achieve long-lasting results. Following these exterior painting checklist items ensures the home remains protected from moisture, sun damage, and temperature fluctuations. Expert knowledge of local climates is essential for determining the right materials for specific regions.
The Importance of Thorough Preparation
Preparation determines the success of every painting project. Professional painters in Arizona know that skipping the initial cleaning or repair phases leads to premature peeling and cracking. A report from Forbes Home suggests that prep work accounts for nearly 75 percent of the time spent on a high-quality job.
Step 1: Surface Cleaning and Pressure Washing
The first step in the step-by-step painting process involves removing dirt, mildew, and pollutants. Dust and grime prevent paint from adhering to the substrate. Professional crews use pressure washers with specific nozzle settings to avoid damaging the wood or masonry.
- Mildew Treatment: If mold is present, a bleach and water solution or a specialized cleaner is applied to kill spores.
- Drying Time: The surfaces must dry completely, which usually takes 24 to 48 hours, depending on humidity levels.
Bonus Tip: Avoid pressure washing directly into vents or under the laps of horizontal siding to prevent water from entering the wall cavity.
Step 2: Scraping and Sanding
Once dry, the team identifies areas where the old finish is failing. Loose, flaking, or bubbling paint is removed using hand scrapers or power tools. Sanding smooths the edges between the remaining paint and the bare surface. This prevents “ghosting,” where the outlines of old paint layers show through the new coat.
Step 3: Surface Repairs and Caulking
Residential painting contractors examine the home for wood rot or damaged masonry. Damaged boards are replaced, and small holes are filled with exterior-grade wood filler.
Caulking is a major part of prep work before painting. Professionals apply a bead of high-quality acrylic or siliconeized caulk to gaps around windows, doors, and trim. This prevents moisture from seeping behind the siding and reduces air leaks. According to data from Energy.gov, sealing air leaks is one of the most effective ways to improve a home’s energy efficiency.
Specialized Painting Tools and Materials
Professional painters use commercial-grade equipment that differs from standard consumer products. The selection of materials depends on the surface type and the local weather.
| Tool/Material | Professional Use Case | Benefit |
| Airless Sprayer | Large flat areas like siding | Provides a thick, uniform coat quickly |
| High-Stuck Primer | Chalky or bare surfaces | Ensures the topcoat bonds properly |
| Elastomeric Coating | Stucco and masonry | Bridges’ hairline cracks and flexes with heat |
| Synthetic Brushes | Trim and detail work | Holds shape better with water-based paints |
| Drop Cloths | Protecting hardscape and plants | Prevents permanent staining from drips |
The Masking and Protection Phase
Before any paint is opened, the surrounding area must be secured. This involves more than just moving patio furniture. Professionals use plastic sheeting, painter’s tape, and heavy-duty drop cloths to protect everything that should not be painted.
- Windows and Doors: Glass and hardware are covered with plastic and tape.
- Roofing: Shingles are shielded where they meet the siding.
- Landscaping: Plants and bushes are covered loosely to allow for air circulation while preventing overspray.
- Light Fixtures: External lights are either removed or wrapped in plastic.
Bonus Tip: Use high-quality blue or green painter’s tape. Standard masking tape can bake onto surfaces in the sun, making it nearly impossible to remove without leaving residue.
Priming and Paint Application
Priming acts as a foundation. It seals the surface and provides a uniform texture for the paint to grip. Bare wood, metal, or masonry always requires a primer. Some modern paints are “self-priming,” but professionals often prefer a dedicated primer for older or weathered homes to ensure maximum adhesion for the final coats.
Application Techniques
Professional exterior painting services in Arizona typically use a combination of spraying and back-rolling. One technician applies the paint with an airless sprayer, and a second person follows immediately with a roller to work the paint into the grain or texture of the siding. This method provides the speed of a sprayer with the durability of a hand-applied finish.
Professional painters in Arizona prioritize the “wet edge” technique. This means they work from top to bottom and side to side without stopping in the middle of a wall. This prevents lap marks where one section of paint dries before the next section is applied.
Cleaning and Final Inspection
The job is not done until the site is clean. The team removes all masking materials, replaces light fixtures, and picks up any debris. A final walkthrough allows the homeowner to inspect the work for consistency and coverage.
Things to Consider Before Making a Decision
Choosing how to proceed with an exterior project requires looking at several variables.
- Weather Patterns: Extreme heat can cause paint to dry too quickly, leading to brush marks. High humidity or rain can ruin a fresh coat.
- Lead Paint Safety: Homes built before 1978 may contain lead paint. According to the Environmental Protection Agency, contractors must follow specific safety protocols when disturbing lead-based surfaces.
- Color Selection: Darker colors absorb more heat and may fade faster in sunny climates. Lighter colors can help keep the home cooler.
- Paint Quality: Higher-grade paints have more solids and better resins, which result in a longer lifespan.
Common Questions About the Painting Process
How long does the average exterior project take? Most residential projects take between three to five days. This includes a full day for washing and drying, another for prep and masking, and two days for application.
What is the best time of year for exterior painting? Stable temperatures and low humidity are ideal. In many regions, spring and fall offer the best conditions for paint to cure correctly.
How often should a house be repainted? According to Zillow, most wood siding needs a fresh coat every 3 to 7 years, while stucco can often go 5 to 10 years between projects.
Common Exterior Painting FAQs
Does pressure washing damage the house?
If done incorrectly, high pressure can gouge wood or strip away the surface of stucco. Professionals use lower pressure settings and wide fan tips to clean without causing structural harm.
Can you paint over old paint without scraping?
Painting over loose or peeling paint is a mistake. The new layer will only be as strong as the old one beneath it. If the bottom layer fails, the new paint will fall off with it.
Why is caulking necessary before painting?
Caulk seals gaps that allow water to enter the structure. Without it, moisture can get behind the paint and cause it to bubble or rot the wood from the inside out.
What is the difference between flat and satin finishes?
Flat finishes hide surface imperfections but are harder to clean. Satin and semi-gloss finishes offer more durability and moisture resistance, making them better for trim and high-traffic areas.
Do professionals use one or two coats?
A two-coat application is the standard for professional results. The first coat provides coverage, while the second coat ensures even color and a thick protective barrier.
Summary of the Professional Approach
High-quality exterior painting is a labor-intensive process that relies heavily on proper preparation. By following a strict exterior painting checklist, professionals ensure the home is cleaned, repaired, and protected before the first drop of paint is applied. This attention to detail results in a finish that looks better and lasts years longer than a rushed application. Homeowners should evaluate the condition of their siding and the quality of materials used when planning their next project.
Quality Exterior Services for Your Home
When your home needs a fresh look or protection from the elements, Local Painters provides expert solutions. The team handles everything from house painting preparation steps to the final inspection. To discuss your project or request a detailed estimate, contact Local Painters at 602-775-3019 or email localpaintersaz@gmail.com. Local Painters serves the community with reliable expertise and a commitment to quality.
Sources
- Forbes Home – A guide on the costs and processes involved in professional exterior painting.
- Energy.gov – Information on how caulking and sealing air leaks improve home energy efficiency.
- Environmental Protection Agency – Safety requirements for painting homes that may contain lead-based paint.
- Zillow – An article explaining the typical lifespan of different exterior paint surfaces.